{{ tocSubheader }}
{{ 'ml-label-loading-course' | message }}
An error ocurred, try again later!
Chapter {{ article.chapter.number }}
{{ article.number }}.
{{ article.displayTitle }}
{{ article.intro.summary }}
Show less Show more expand_more Lesson Settings & Tools
| | {{ 'ml-lesson-number-slides' | message : article.intro.bblockCount }} |
| | {{ 'ml-lesson-number-exercises' | message : article.intro.exerciseCount }} |
| | {{ 'ml-lesson-time-estimation' | message }} |
Some geometric constructions can be made using a compass and straightedge. In the absence of these tools, however, are other tools or methods viable options? This lesson will focus on different methods, such as using a string and paper folding to make geometric constructions.
Catch-Up and Review
Here are a few recommended readings before getting started with this lesson.
Explore
Investigating a Segment's Length With a String
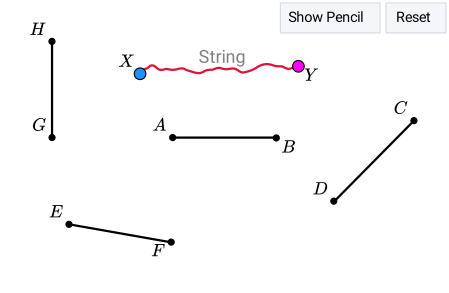
Ignacio needs to determine if the following segments are congruent to each other. However, he only has a piece of string and a pencil. Is he able to do it? If so, how?
Extra
How to Use the Applet- The string can be moved by clicking and dragging either endpoint.
- To fix an endpoint at its current position, press the corresponding button.
- To make a mark on the string, first press the
Show Pencil
button. Then, move the pencil tip over the place to mark. Finally, release the click.
Challenge
Locating a Triangle's Incenter Without Tools
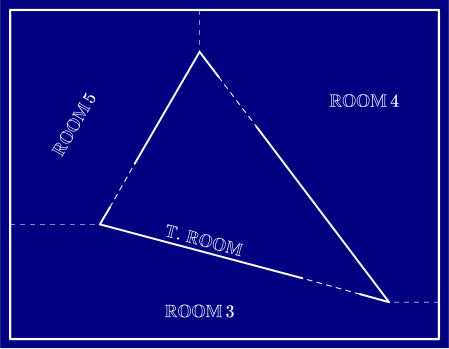
A natural history museum manager hopes to place a replica of a moai statue in a triangular room in such a manner that the statue is equidistant from the walls that will have detailed diagrams and explanations. The location of the statue corresponds to the incenter of the triangle formed by the walls. This placement will allow for a clear walking path.
Discussion
Copying a Segment With a String
When copying a segment using a straightedge and compass, the function of the compass is to measure the length of the segment. With this in mind, a string can be a good substitute for the compass.
Using a straightedge and a string, it is possible to construct a copy of a segment.

The following three steps can be used to draw a segment with the same length as AB.
1
Draw a Segment Longer Than AB
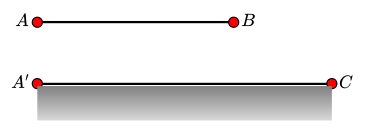
expand_more With the straightedge, draw a new segment A′C such that it is longer than AB.
2
Measure AB with a String
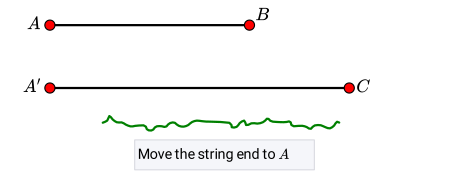
expand_more Place one end of the string at A and hold it down. Once done, stretch the string so that it forms a straight line and is aligned with AB. Then, using the pencil, mark the point on the string that is above B. This will be the length of AB.
3
Draw B′ on the New Segment
expand_more Move the end of the string from A to A′. Once again, stretch the string so that it forms a straight line and align it with A′C.
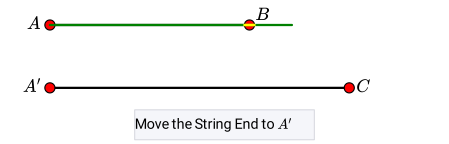 The marked point on the string indicates the location of B′. Then, mark this point on A′C and label it as B′.
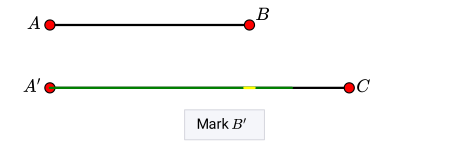 Finally, by erasing the unnecessary part of A′C, a segment whose length is the same as the length of AB will be obtained.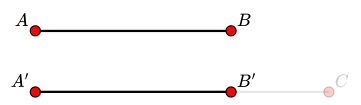
As can be seen, AB and A′B′ are copies of each other.
Discussion
Copying an Angle Using a String
Using a straightedge and a string, it is possible to construct a copy of an angle.
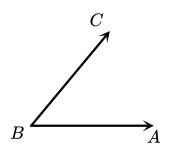
The following five steps can be used to draw an angle whose measure is equal to the measure of ∠ABC.
1
Draw a Ray with Starting Point E
expand_more To begin, draw a ray using a straightedge and label its starting point as E.
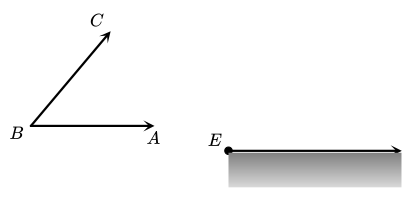
2
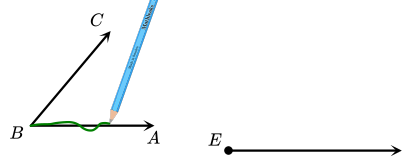
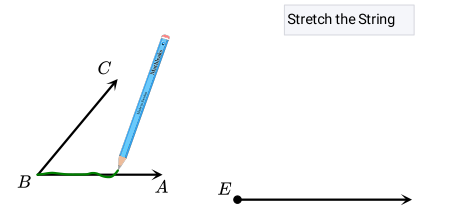
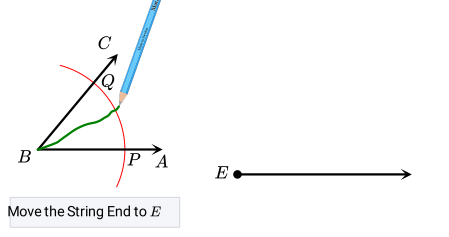
Draw Arcs Centered at B and E Using the String
expand_more Start by tying a pencil to one end of the string and locating the other end at B. The string must be shorter than the sides of the angle.
3
Measure the Distance from P to Q
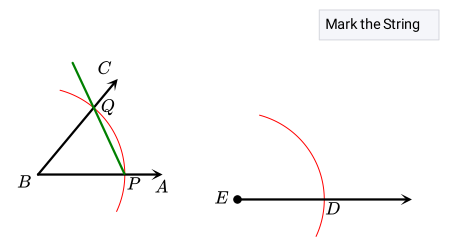
expand_more To measure the distance between P and Q, untie the pencil. Then, place one end of the string at P and hold it down. Next, stretch the string so that it forms a straight line that passes through Q.
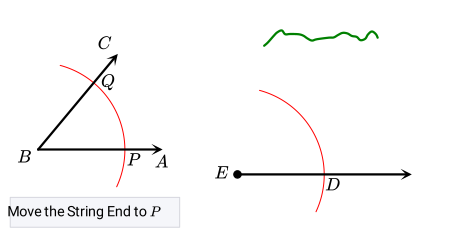 Then, mark the point on the string that is on Q and tie the pencil to the string so that its tip is over the mark. It is not a necessity, but the remaining part of the string can be removed.
4
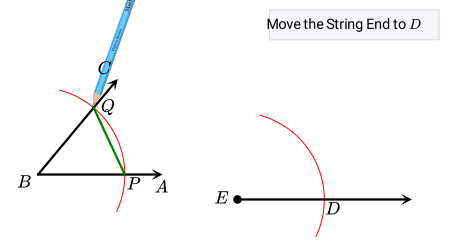
Draw an Arc Centered on D with Radius PQ
expand_more Move the free end of the string to D and make an arc that intersects the previous arc. Let F be the intersection point.
5
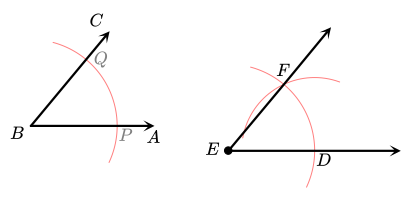
Draw EF
expand_more Using the straightedge, draw EF. This ray along with ED form ∠DEF whose measure is equal to the measure of ∠ABC.
Discussion
Bisecting an Angle by Paper Folding
Paper folding, also referred to as origami, provides an alternative method for making constructions when tools such as a compass are not on hand.
An angle can be bisected using only a straightedge and folding the paper.
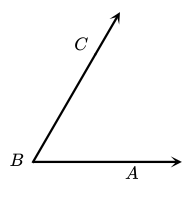
To bisect ∠ABC, the following two steps can be done. If available, it is recommended to use tracing paper.
1
Fold the Paper
expand_more Fold the paper in such a way that BA lies on BC. Then, unfold the paper. Notice that B is in the crease. 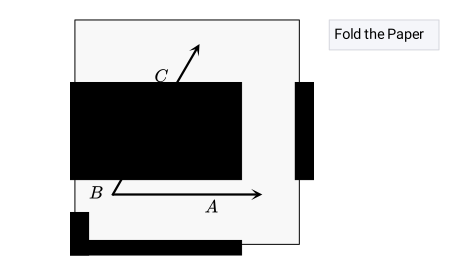
2
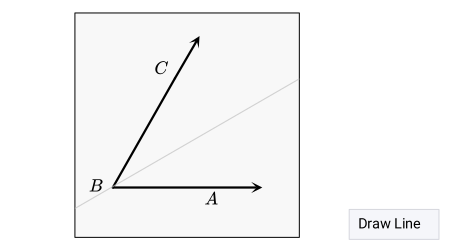
Draw the Angle Bisector
expand_more Using a straightedge, and starting at B, draw the line that the crease made in the paper. This line is the angle bisector of ∠ABC.
Example
Solving Problems by Paper Folding
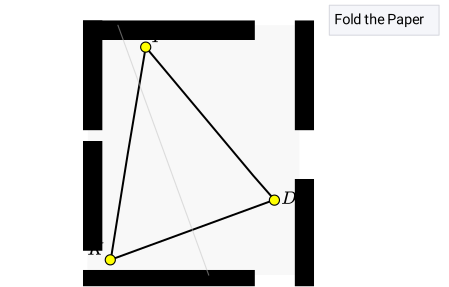
Using the folding paper technique, the challenge presented at the beginning of the lesson can be solved. A natural history museum manager hopes to place a replica of a moai statue in a triangular room in such a manner that the statue is equidistant from the walls that will have detailed diagrams and explanations. The location of the statue corresponds to the incenter of the triangle formed by the walls. This placement will allow for a clear walking path.
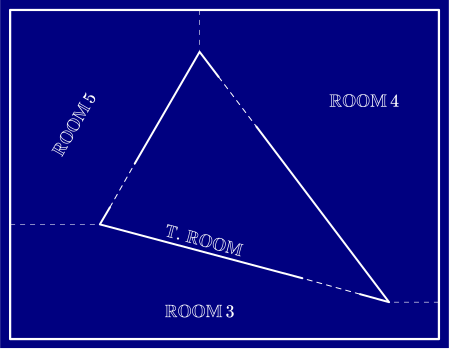
The manager's son, Kevin, sees the blueprint and wants to help to locate the incenter. Unfortunately, he does not have a protractor. Can he locate the incenter on the blueprint? If so, how?
Answer
Can he locate the incenter? Yes.
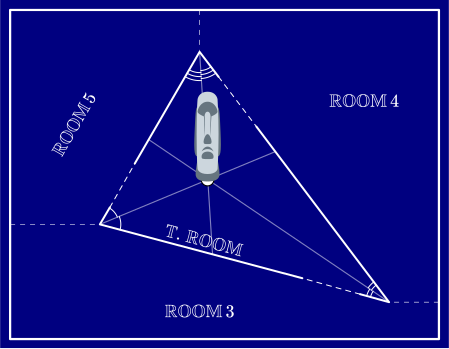
How? By folding the blueprint, two different angle bisectors can be drawn. The point where the angle bisectors intersect corresponds to the incenter of the triangle.
Graph:
Hint
Draw two different angle bisectors by folding the blueprint. The incenter is the point of intersection of the angle bisectors.
Solution
Kevin needs to find the incenter of the triangle formed by the room's walls.
|
Incenter |
|
The incenter of a triangle is the point of intersection of the triangle's angle bisectors. |
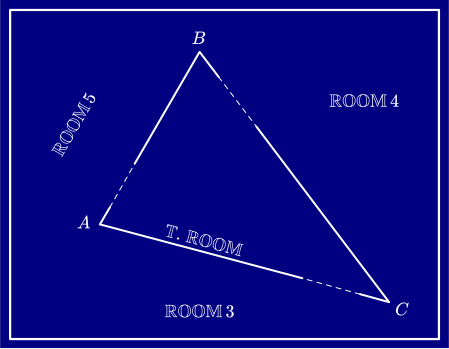
To obtain the point of intersection, Kevin needs to draw at least two angle bisectors to locate the incenter. To do so, begin by labeling the vertices of the triangle.
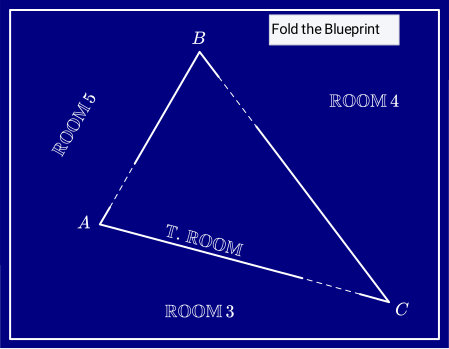
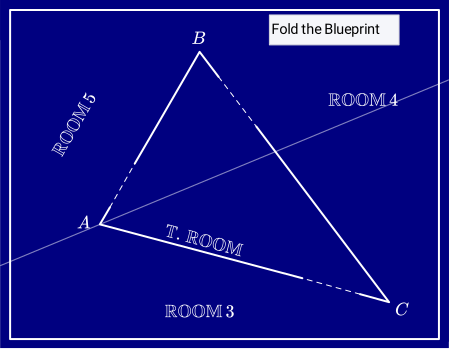
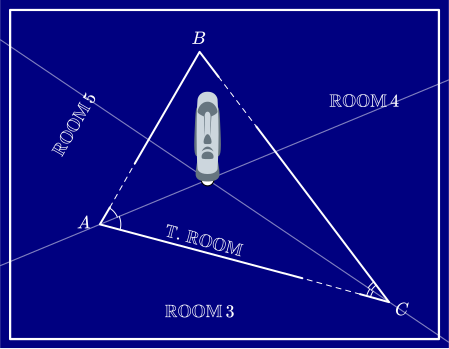
Notice that, thanks to the Incenter Theorem, the angle bisector of ∠B does not have to be drawn to locate the incenter.
Discussion
Drawing a Perpendicular Bisector by Paper Folding
The usual way to draw the perpendicular bisector of a segment involves a straightedge and a compass. However, the same construction can be done without a compass.
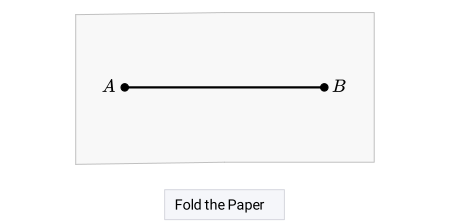
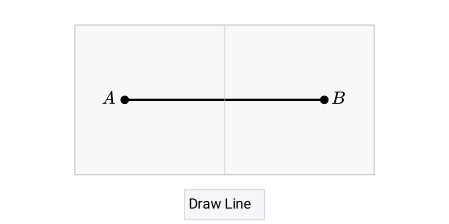
Given a segment drawn on a paper, its perpendicular bisector can be drawn only using a straightedge and a pencil.

1
Fold the Paper
expand_more Fold the paper in such a way that A matches B. Then, unfold the paper.
2
Draw the Perpendicular Bisector
expand_more Using a straightedge, draw the line that the crease made in the paper. This line is the perpendicular bisector of AB.
Example
Solving Problems by Paper Folding
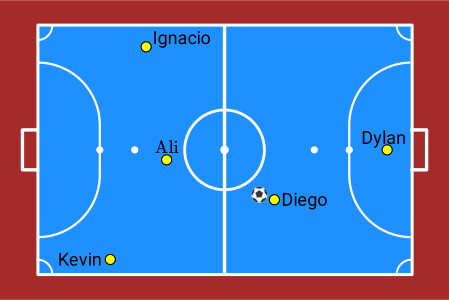
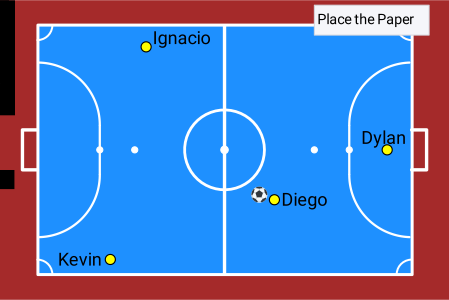
Math teacher by day, the world's greatest futsal coach by night, Coach Tiffaniqua drew the following formation on a board to teach her players where to position themselves when taking a free kick near the court's center.
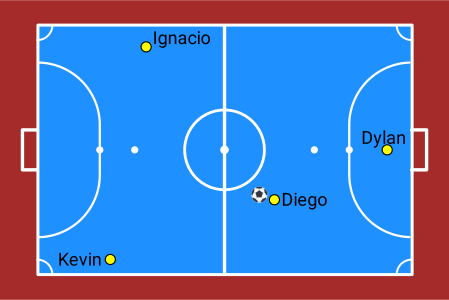
Ali, ecstatic, asked where he should be in the formation. Coach Tiffaniqua told Ali that he should be positioned the same distance from Diego, Ignacio, and Kevin. Determine where Ali should be positioned on the futsal field.
Answer
Diagram:
Hint
Use the fact that the circumcenter — the point of intersection of the triangle's perpendicular bisectors — is equidistant from the vertices.
Solution
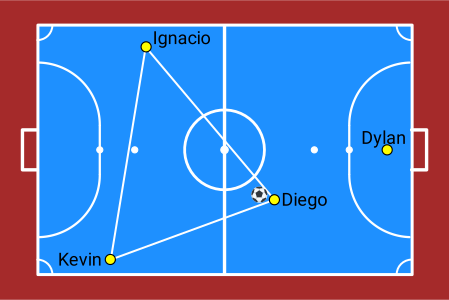
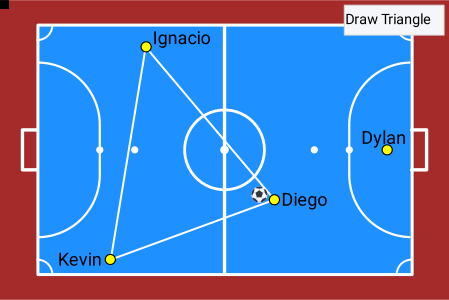
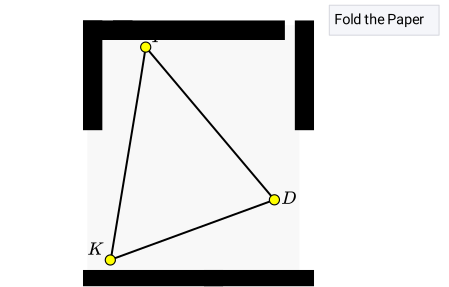
Notice that Diego, Ignacio, and Kevin form a triangle. Thus, Ali should be positioned at a point that is equidistant from the vertices of this triangle.
Discussion
Drawing a Perpendicular Line by Paper Folding
The last construction of this lesson will be to draw a line perpendicular to a given line through a point that is not on the line. Of course, this can be done using a straightedge and compass. However, it is possible to do so without the use of a compass.
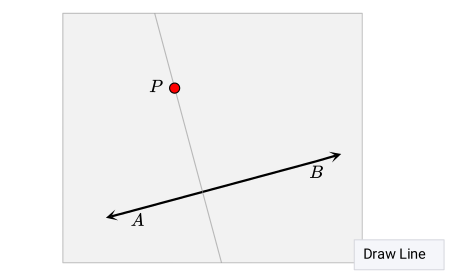
A line perpendicular to a given line through a point not on the line can be drawn by using only a straightedge and a pencil.
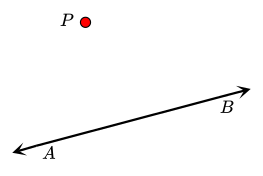
To draw a line perpendicular to AB through P the following two steps can be used.
1
Fold the Paper
expand_more Fold the paper so that P is on the fold, and the lines lie on each other. 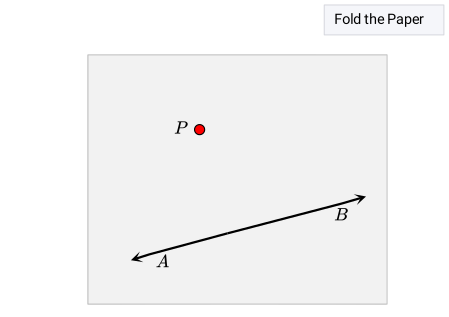
2
Draw the Perpendicular Line
expand_more Using a straightedge, draw the line that the crease made in the paper. This line is perpendicular to AB.
Closure
Drawing an Orthic Triangle
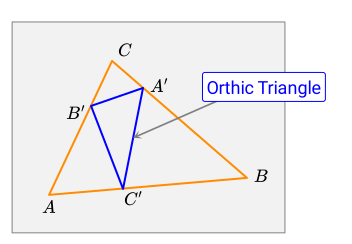
Ali has a piece of paper with an acute triangle drawn on it. He wants to draw the orthic triangle corresponding to △ABC whose vertices are the feet of the altitudes of △ABC.
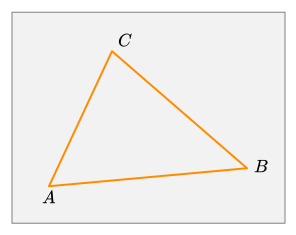
However, Ali does not have a compass at hand. Help Ali draw the desired triangle.
Answer
Diagram:
Hint
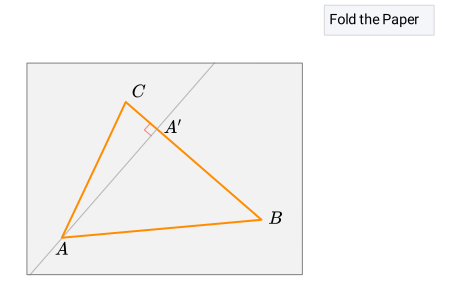
To draw the altitude from A, fold the paper so that A is on the crease and the part of BC in one part of the paper falls above the other part of BC.
Solution
To draw the orthic triangle, the three altitudes of △ABC are needed. To start, draw the altitude from A by folding the paper so that A is on the crease and BC is lined up in both parts of the paper.
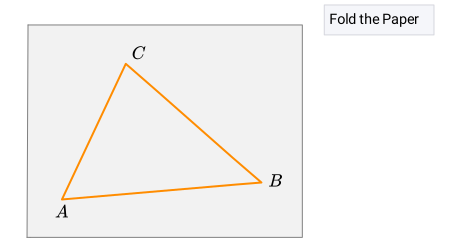 Using the same method, the altitudes from B and C can also be drawn.
 This construction gives the feet of the altitudes and the orthocenter of △ABC. Finally, draw the orthic triangle by connecting A′, B′, and C′.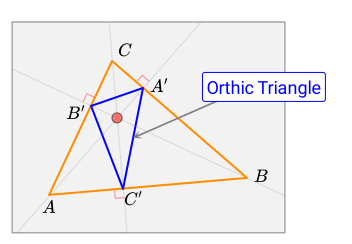
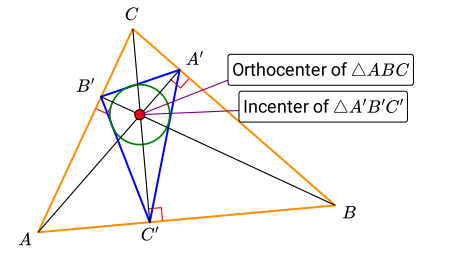
Before finishing the lesson, two interesting facts about the orthic triangle — also called the pedal triangle.
- The orthocenter of △ABC is the incenter of the orthic triangle.
- The orthic triangle is the triangle with smallest perimeter that can be inscribed in an acute triangle.
Loading content